


How to Build a Unistrut Solar Panel Roof Rack on a Van
Step-by-step Instructions
Bold numbers refer to pictures in slideshow
(2, 3, 4) First, purchase the Unistrut (also branded as Superstrut). The unistrut for the side rails is 1-5/8″. The unistrut used for the crossbars is 13/16″. For this installation, we bought 5 pieces of gold galvanized unistrut from HD/Lowes (in the electrical section), then spray painted it with Rustoleum semi-gloss black spray paint. Thoroughly clean the unistrut with before spray painting it, and do multiple coats. You may be able to source powdercoated unistrut from a local specialty building store, but our spray paint job has already lasted a year and still looks great!
(2, 3, 4) The unistrut side rails mount to the Vantech roof mount adaptors using Vantech’s included bolts. We did not use the washers from Vantech (they are too small). Picture 4 shows the 3/4″ diameter washers that solidly extend across the holes in the unistrut.
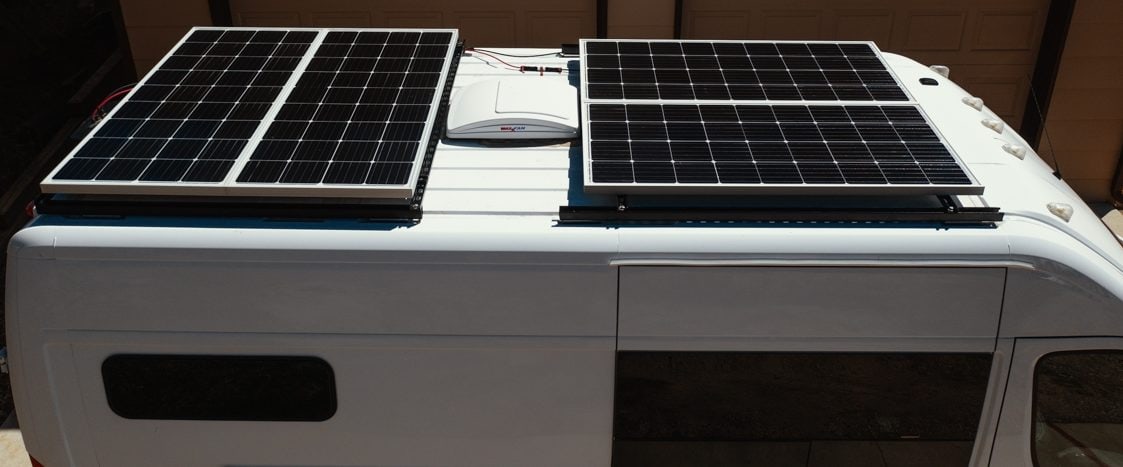
Our Promaster’s roof is 12′ long (159″ non-extended model), but unistrut commonly comes in 10′ lengths. So, we cut the 10′ unistrut in half and created a 2′ gap in the middle (3). This way, it spans the 12′ length of the roof. The gap aligns with the MaxxAir fan. This allows each section of unistrut to be securely mounted to 2 Vantech adapters.
(5, 6, 7) To secure the solar panels to the unistrut crossbars, we used 3/8″ bolts, external tooth lock washers, and nylon unistrut cone nuts.
(8, 9) On all bolts, we used blue Loctite. Over the course of 2 years, no bolt has loosened.
(10) In order to fit thicker 3/8″ bolts into the 1/4″ holes on the HighTec solar panel, we drilled out the hole with a 3/8″ bit. Be more careful than us and put a small piece of wood or metal between the drill bit and the solar panel so the drill bit doesn’t accidentally hit the panel.
(11) We also used an angle grinder to grind out the interior of the frame under the hole so the bolt head could fit and spin/tighten.
This is all worth the extra effort to have stronger bolts and peace-of-mind when traveling 80mph on a windy highway.
(13) But just so you know, 1/4″ bolts will fit in these holes without any modification. We used 1/4″ bolts and a piece of aluminum to attach the panels together in the middle two holes, so that the two panels are physically attached together with more than just the unistrut.
(14) Important: When mounting the unistrut crossbars onto the solar panels, you will need to attach everything together on the ground, with the panels on their faces. All the bolts and unistrut cone nuts must be loosely mounted to the panel first. Then, slide the unistrut crossbar over all 4 cone nuts in a line. Tighten bolts once crossbar has been attached. See video.
Once the 13/16″ unistrut crossbars are mounted to the panels, lift the 2-panel array up onto the 1-5/8″ unistrut side rails on top of the van.
(15, 16) Secure the crossbars into the side rails with the same 3/8″ bolts, nylon cone nuts, external tooth lock washers, and Loctite. Note: A regular lock washer is pictured in #15; we replaced these with external tooth lock washers as shown in picture 16 for better long-term vibration resistance.
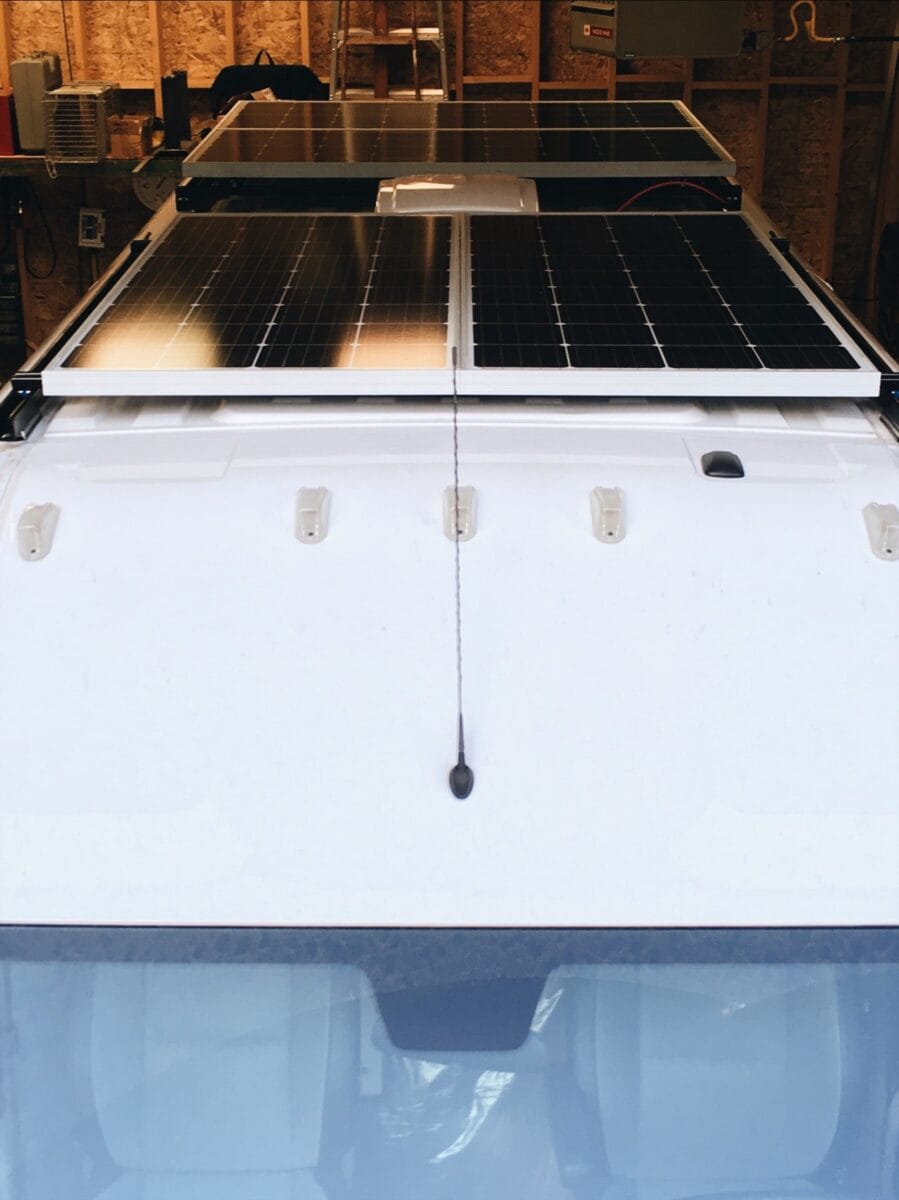
(17) The rear panels had to mount sideways to fit behind the roof vent fan. This makes the panels the same width as the side rails, which in turn creates a problem of not being able to access the bolts to tighten them. As a workaround, we had to mount the rear panels on 2 sets of crossbars. This way, they mount using the same method as the front panels, just perpendicular. Unfortunately, this raises the rear panels up by 13/16 of an inch. However, this does help the rear panels clear the vent fan when it is open.
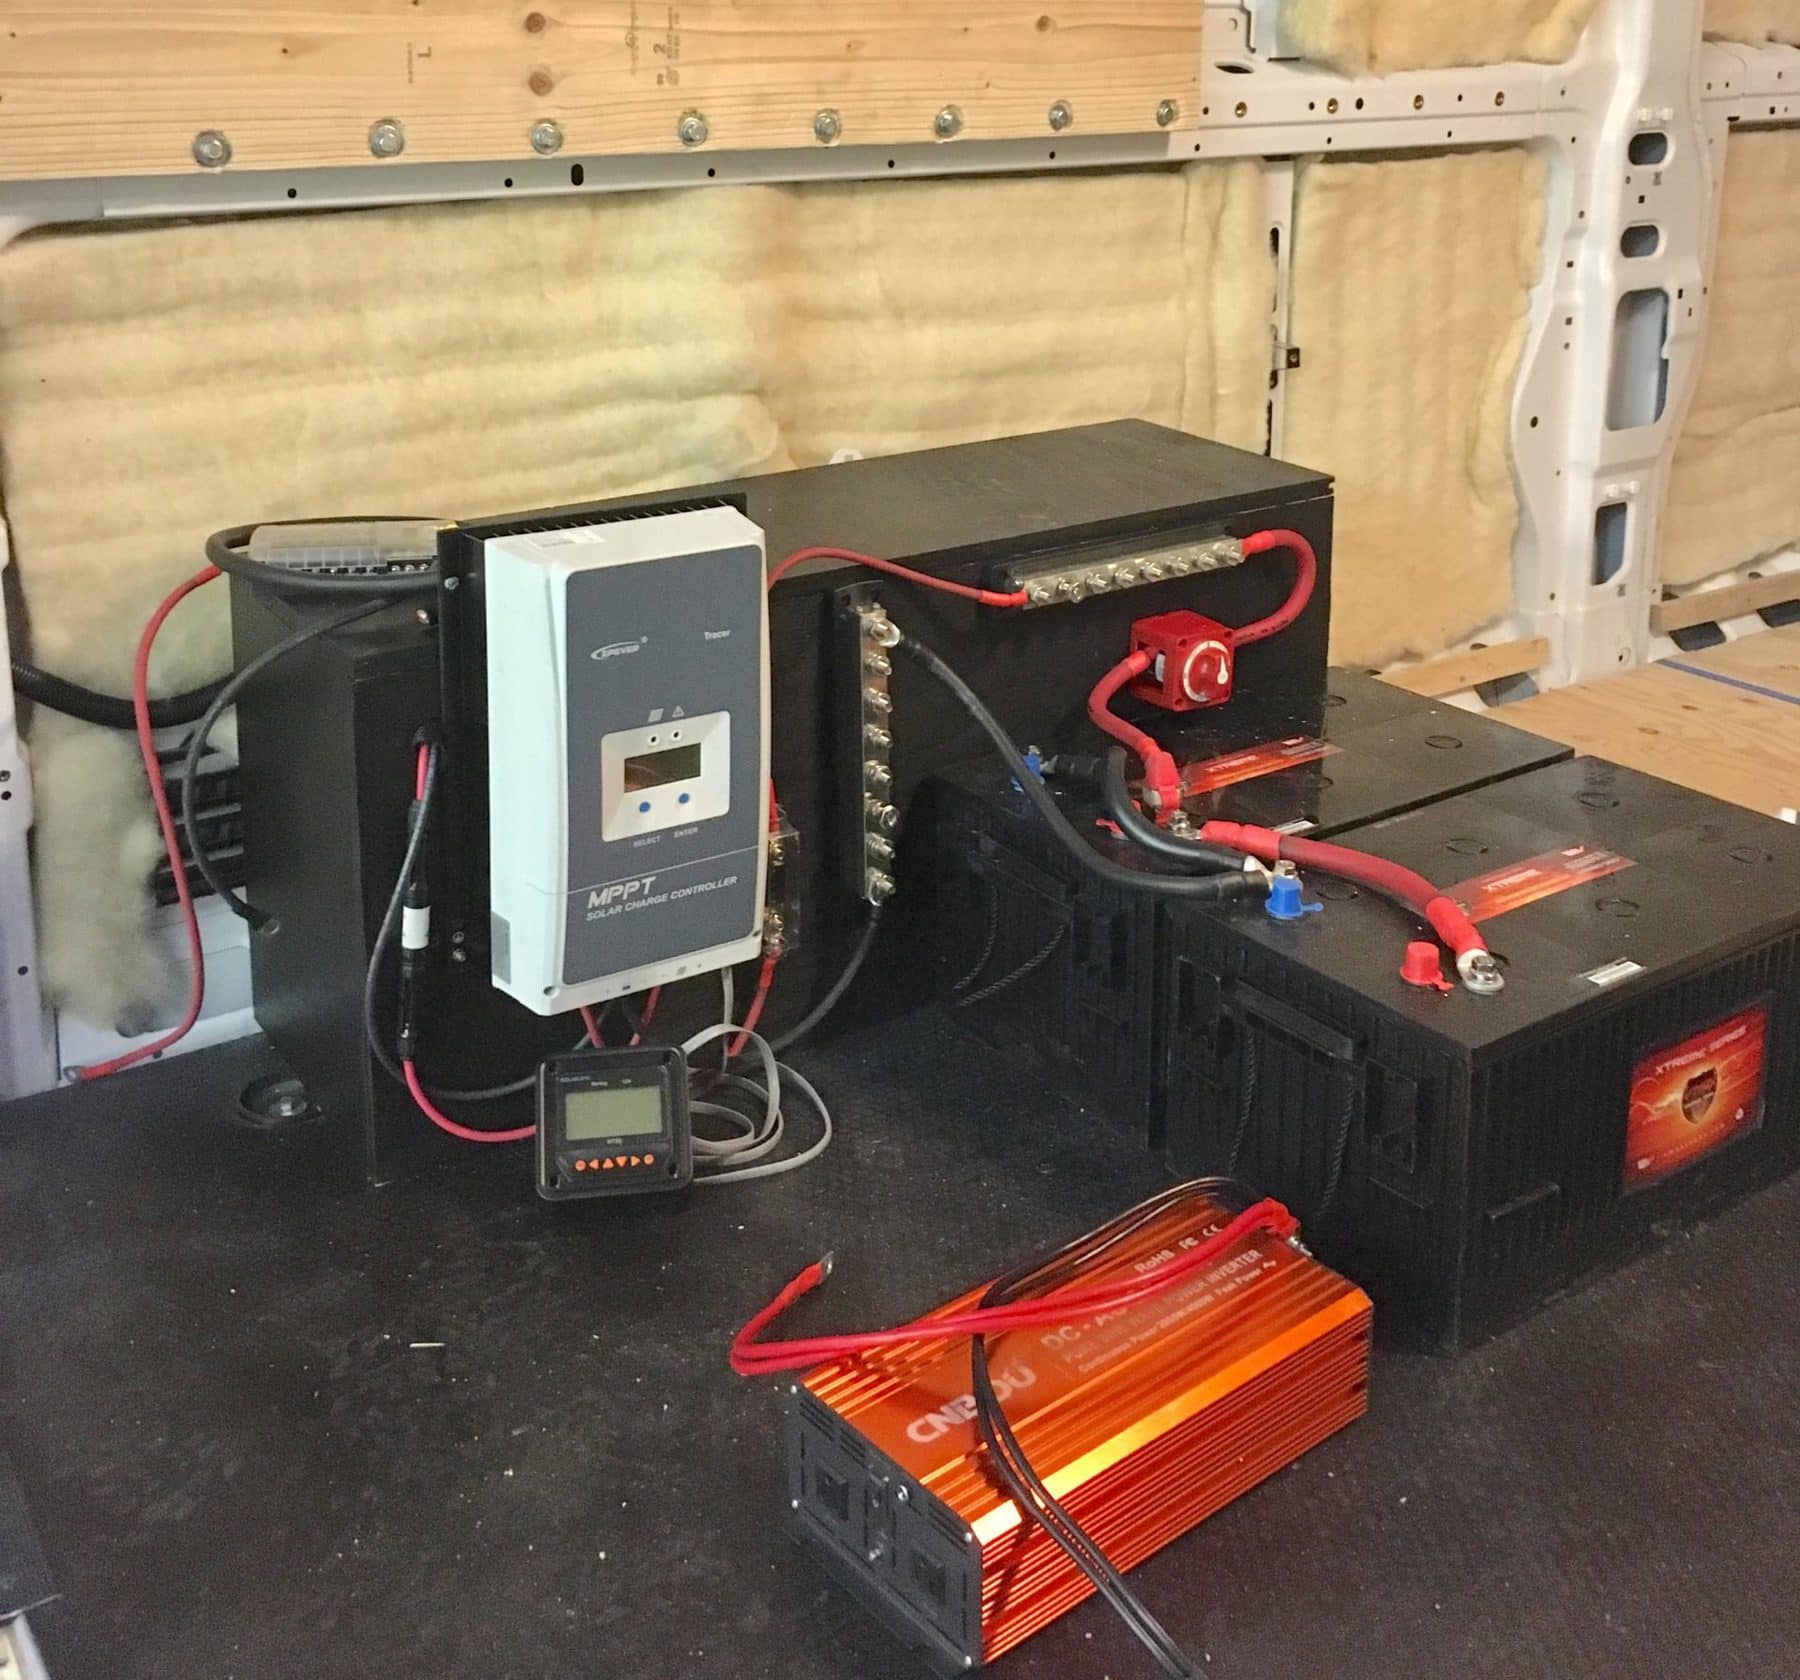
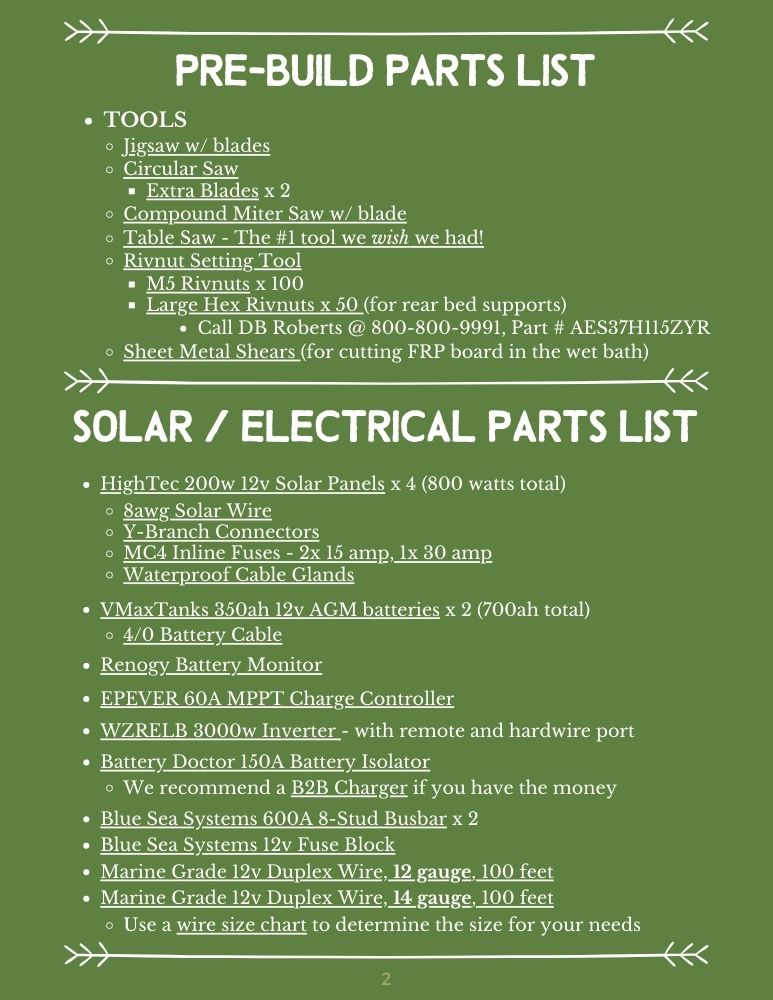
(18) Each set of 2 panels is wired together in series with a 15 amp inline MC4 fuse. Then, those 2 sets (so 4 panels total) are wired together in parallel with a 30 amp inline fuse before entering the rear backup camera housing.
(19) Size PG-7 cable glands will barely fit an 8awg solar cable. TIP: Use grease to help the solar cable through the cable gland. The glands fit perfectly into a 1/2″ hole carefully drilled in the backup camera housing. Finally, use a dab of silicone adhesive to seal around the gland/hole.
And there you have it! A fully custom, DIY solar panel roof rack for a Promaster van! Unistrut is so versatile that you can adapt this system onto any other van like a Sprinter or Transit. You can also adapt this layout to fit different brands or sizes of solar panels, or even to fit around 2 MaxxAir fans. Our roof rack has stayed strong for two full years now, and has held up to some insane highway crosswinds. Not a single bolt has loosened. Happy building and enjoy living that 100% solar lifestyle!